 Special Features
 Breast Form Project
 Putting All Together
annie's place
 Special Features
 Breast Form Project
 Putting All Together
|
At this time, you should have one completed casing, which is sealed except for a half-inch (or so) opening at the pointy end, and a plastic bag of the formulated filler.
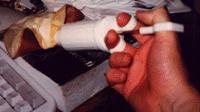
I'm sure there are many ways of filling the form with the compound, but I will explain my method. I used a cake-decorating syringe with a 1/4" injection nozzle. I also use this nozzle as a final test for the consistency of the goo. The compound should flow through the nozzle only under moderate pressure. If it flows without any pressure, it is too thin (allow to dry out in air) and if it requires extreme force or will not flow through the 1/4" nozzle, it is too thick (add H2O and knead).

Using the cake syringe, I fill the form almost to the point that the casing has its original shape when the fabric back is laid on a flat surface. Then I evacuate all remaining air and seal using rubber cement applied with a q-tip. Again, be VERY careful to avoid cementing the top of the casing to either the lips or the bottom flap.
Since rubber cement dries very rapidly, the form will be ready to test shortly after it is filled and sealed. Carefully inspect the completed form and try it on for size.