 Special Features
Breast Form Project
Filler (original)
Special Features
Breast Form Project
Filler (original)
|
annie's place
Special Features
Breast Form Project
Filler (original)
|
I experimented with three types of "filler".
1. Ordinary tap water.
2. Rubbermaid blue ice compound. "Blue Goo"
3. Homemade elastomer compound, like a slimy "Silly Putty".
Water has the advantage of being extremely cheap and readily available. It also approximates the specific gravity of human breast tissue. However, it is not viscous enough for a natural feel, and should a leak develop, the casing will evacuate immediately with the possibility of severe embarrasment. It's good for testing new casings and wearing in a pinch, however.
Blue goo (Rubbermaid blue ice) has a consistency at room temperature that (IMAO) more correctly approximates human breast tissue. It's also readily available and reasonably priced (bags of this can be obtained at any large supermarket for a few bucks). This compound flows rapidly out of a leak, and can be more embarrassing than H2O, since it's bright blue in color. It does, however, appear to rinse out of most any fabric. On a recent trip, I wore a set of the plain latex casings with blue goo filler while driving about 350 miles, plus several hours outdoors and in air-conditioned buildings. When the goo reached the combined body/ambient temperature, the viscosity appeared to be just about the same as plain old H2O.
I was looking for something that was more viscous than H2O, readily available, and would not explosively evacuate should a leak develop.
For some crazy reason, some childhood memories arose ....
In every neighborhood, there was at least one "Junior Mad Scientist" who would amaze friends by making slimy things, noisy things, fizzy things, gooey things (sometimes destructive things) out of ordinary household items. Well, my evil twin brother was sometimes described in those terms in earlier years. :)
When I was a kid, Silly Putty
My flashback was to the failed attempts to make this stuff, which
resulted in a white slime that would not bounce and was impossible to
get out of carpets. The compound I used in this project was a
recreation of the failed attempts, intentionally using the
"wrong" measurements for Faux Silly Putty.
This compound has unusual cohesive and adhesive properties. It will
refuse to flow out of a small hole, plus it comes off of most items
readily, including most fabrics. It requires some "kitchen
chemistry"
to make, but if your culinary abilities have advanced past microwaving
Stouffer's Yuppie Chow, you should be able to make this with no
problem. The amount of goo you will need will depend on your cup size,
so some experimentation will be necessary.
You will need:
1. Ordinary white glue. I strongly recommend the
"Elmer's" brand, since
the formulation of cheaper brands will vary.
2. Borax. You can (still) get this in the laundry aisle of any large
supermarket. Yeah, this is the stuff that Ronnie Raygun used to hawk
on Death Valley Days. :)
3. Ordinary tap water. I keep thinking that distilled water would give more
consistent results, but I have not used it for this project.
4. Measuring cups, spoons, plastic bags, etc.
Procedure:
The mixtures you will be creating are as follows, in three steps:
Solution 1 (borax) = Borax powder + H2O
Solution 2 (glue/water) = Elmer's Glue + H2O
Final compound = Solution 1 + Solution 2
Be sure to make the two solutions first and then combine them for the
final compound. Do NOT simply mix borax, glue, and H2O, as this will
not give the desired results.
1. Make a saturated borax solution. One cup or so should suffice for a
few batches of goo. Start by dissolving a tablespoon or so of borax in
a cup of warm water. Stir like a mother. Add borax until no more will
dissolve. Pour off the solution into a jar and discard the sediment.
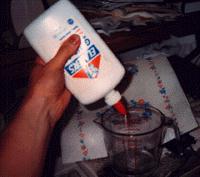
2. Make a 50/50 mixture of white glue and ordinary tap water. 1/4 cup
glue and 1/4 cup H2O would be good for your first batch.
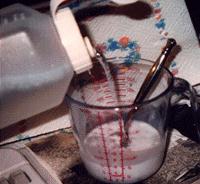
3. Add borax solution to the glue/water solution and stir. Use about 1/4
cup of borax solution for the quantity outlined above in step 2.
The glue solution will congeal into a cohesive blob of
"slime"
that should stick to the spoon, surrounded by a milky liquid.
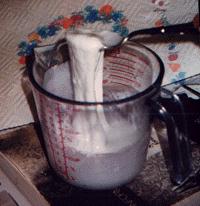
Remove the "slime"
and place into a clean cup or jar. Discard the
remaining liquid. Continue to stir the slime until it's smooth and
free of lumps.
At this time, it should pour very slowly. If it does not pour visibly
at all, it is too thick, and SMALL amounts of H2O should be added with
stirring (or kneading) until it will very slowly pour. If it
is too liquid, let it stand in the air for an hour or so, stir, and
repeat until it pours very slowly.
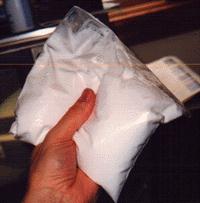
Place the compound into a clean airtight plastic bag for storage. It
can then be kneeded if necessary to smooth out any lumps or
inconsistencies. Sometimes this appears to stiffen a bit after it has
been stored in the bag for a few hours. If it appears too stiff, add
a small amount of H2O and knead until smooth.
If you wish, you may add a few drops of food coloring at this time to
approximate a flesh tone. A few drops of red and green will produce
a caucasian flesh color. Knead to start the color mixing, but it will
diffuse quite nicely over time.
[back to forms main page]
[back to features]
[home]
[whats new]
[bio]
[links]
[events]
[guestbook]
[photo album]
[images]
Send Me Mail